RacePod trailer
History
Racepods made by Formula Trailers of Ashton under Lyne(Manchester) were introduced when only a few covered racecar trailers were available,and it was intended primarily as a shelter for the racecar in transit.
Later all the trailer manufacturers recognised the move toward covered trailers and now of course there are loads available.
Meanwhile, users needs changed, from wanting to cover the racecar to having a rolling workshop & shelter.
At the same time historic racing came to predominate club motor-sport. The historics tended to need more parts and support, and often go to more distant circuits. So they need bigger trailers, and more ways to store kit.
For some time there was a plan for a smaller version of the Racepod to be produced; but as things evolved, the Racepod itself became one of the smallest trailers on the market.
Specification
2 x Indespension axles @ 1000kg each, with 8-ply 145/70 or 155/70 low profile tyres on 12" rims.
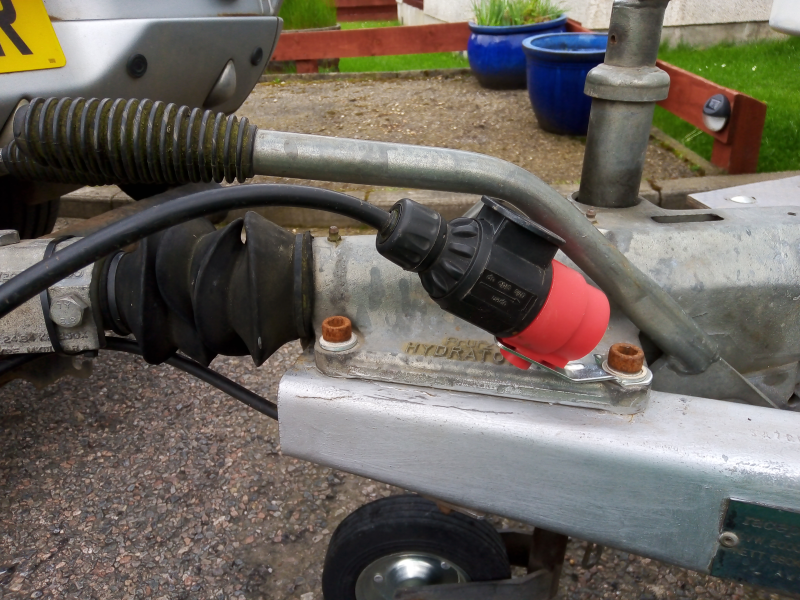
Bradley Doublelock coupling.
Knott auto-reverse brakes.
Full GRP bodyshell.
Phenol ply centre deck and loading ramp surfaces.
Dimensions
Gross weight 2000kgs., nett 680kgs., tare 1320kgs.
Overall width 2300mm/7'7"
Overall length 5300mm/17'6"
Overall height 2250mm/7'5
Internal width 1860mm/6'1"
Internal length 4000mm/13'
The nose moulding adds 250mm / 10" at centre
Interior height is 1800mm/6'at the centre
Each Pod was supplied as standard with a tyre rack, spare wheel,manual strap winch, locating chocks and a coupling bullet lock.
Promotional images from Formula Trailers


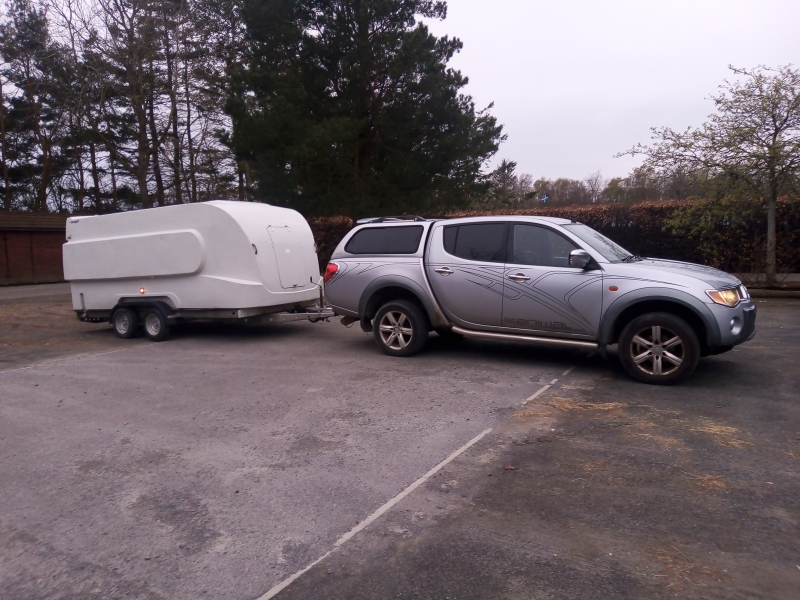
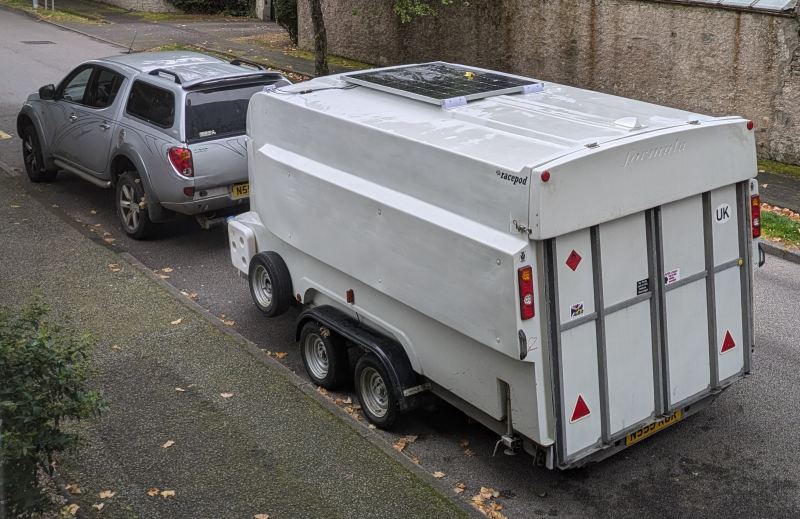
My trailer
With now having the Ranger Cub and the GTM Coupe at home, it was necessary to store one car in my single garage and one outside under a cover. This worked for the first winter where I had the coupe on my open trailer, covered both with a fitted car-cover and a tarpaulin. However I was worried that this would not be too good for it. I started to price up the cost of installing either a lean to carport or building one myself. The cost soon mounted up and I though for that price I could buy a covered trailer.
so I started to trawl the usual places of Guntree, Ebay and Facebook market place.
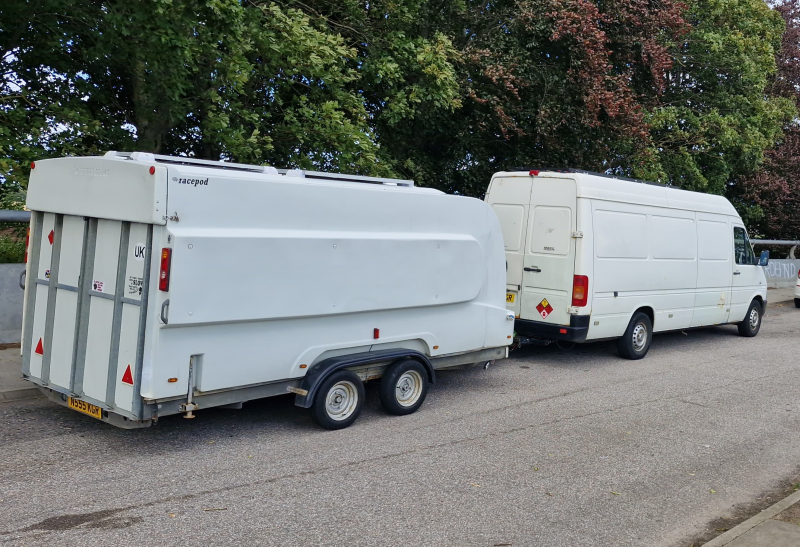
In April 2024 I noticed a Forumla RacePod for sale locally and quickly set about finding the internal sizes and measuring the cars and driveway. I made an offer on it and soon went off to collect it from a Formula 2 Stockcar driver.
 Stop on the way home |
I knew everything would fit in the trailer, but also knew the wheelbase was slightly wider than the slabs I had laid up to the garage.
I looked at various options.
Moving the slab apart would mean that the cars wouldn't fit on them so well and the trailer would be very close to the house wall and where the heating pipes enter the house.
I settled on widening the side away from the house by 300mm, at the same time, I did the neighbours as he wanted similar for his caravan. This still leaves a narrow strip of chuckies so drainage wasn't effected.
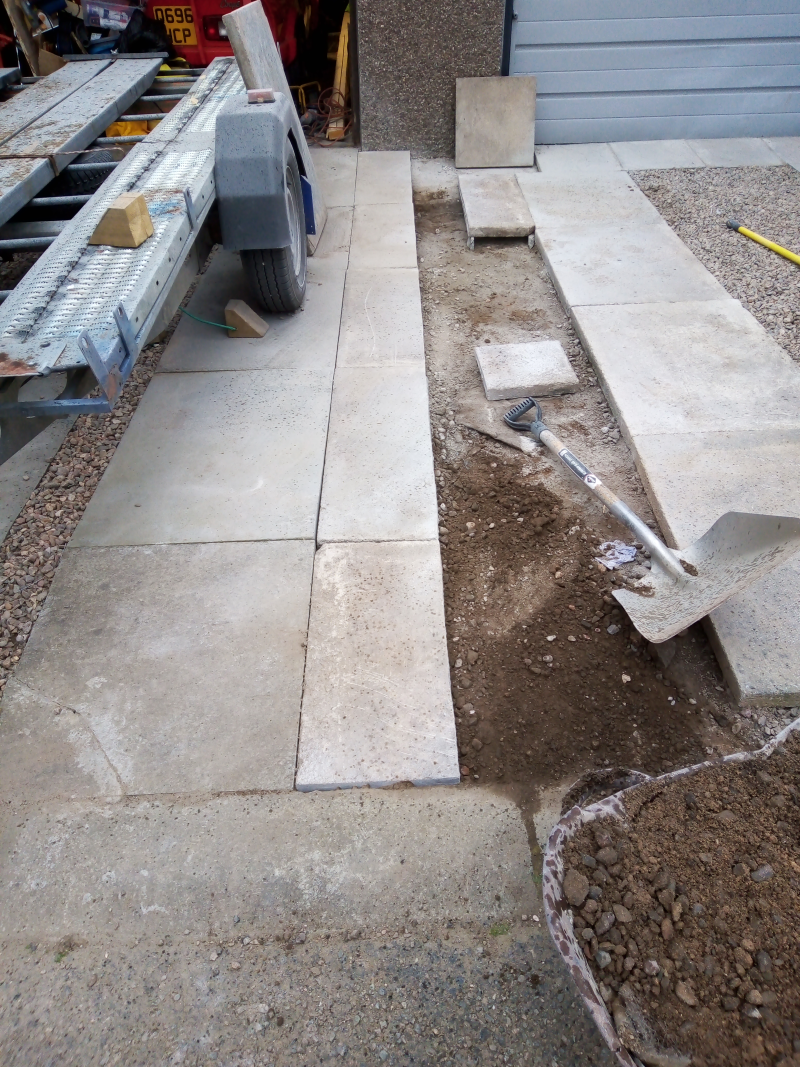 Widened driveway |
The Trailer was in overall in good shape with only a few minor problems I knew I could repair.
So I set about stripping the interior of the tyre rack (which I later sold), removing all the storage hooks/boxes/pockets from the side walls and removing the extra lights/wiring/switches fitted. I then degreased the inside and washed it out.
Now the repair work could begin.
To start a few pop-rivets holding the ply and the old sealant around the outside was replaced. A patch had to be welded in the doorway metalwork, where a small rectangle had been removed to, I suspect, to allow the rear wing end plate of the stock-car to fit.
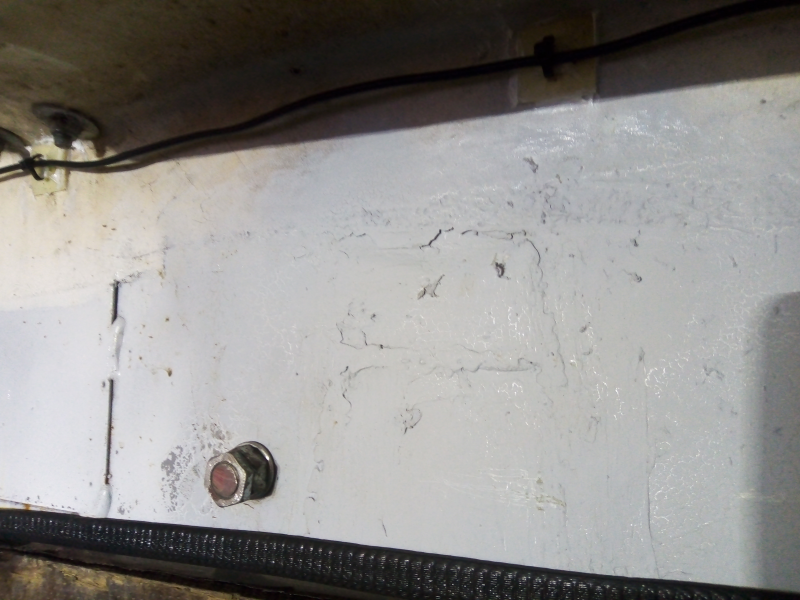 Welding |
Having repaired the hole in the trailer I set about making some more!
I have never liked traditional bayonet cap bulbs on a trailer, I have always found that they worked loose. So I decided to swap the led lights I had on my open trailer with those on the Racepod.
This meant cutting some holes on both GRP door surrounds to allow the lights to fit.
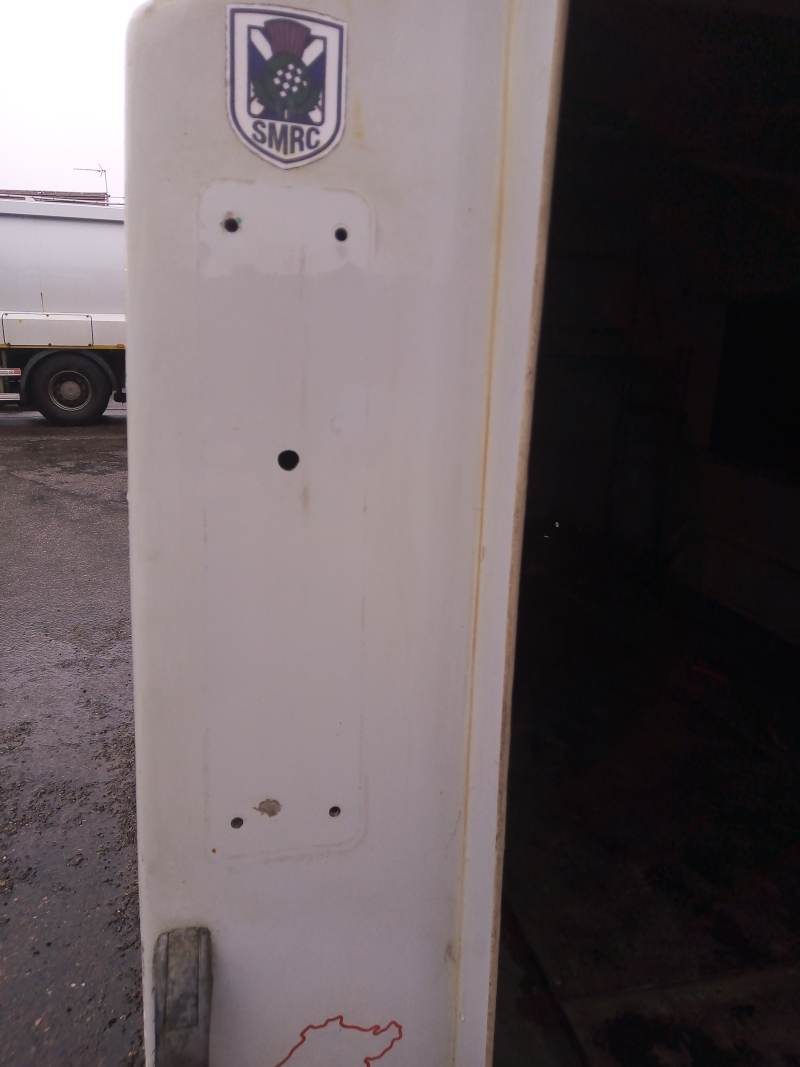 lights off |
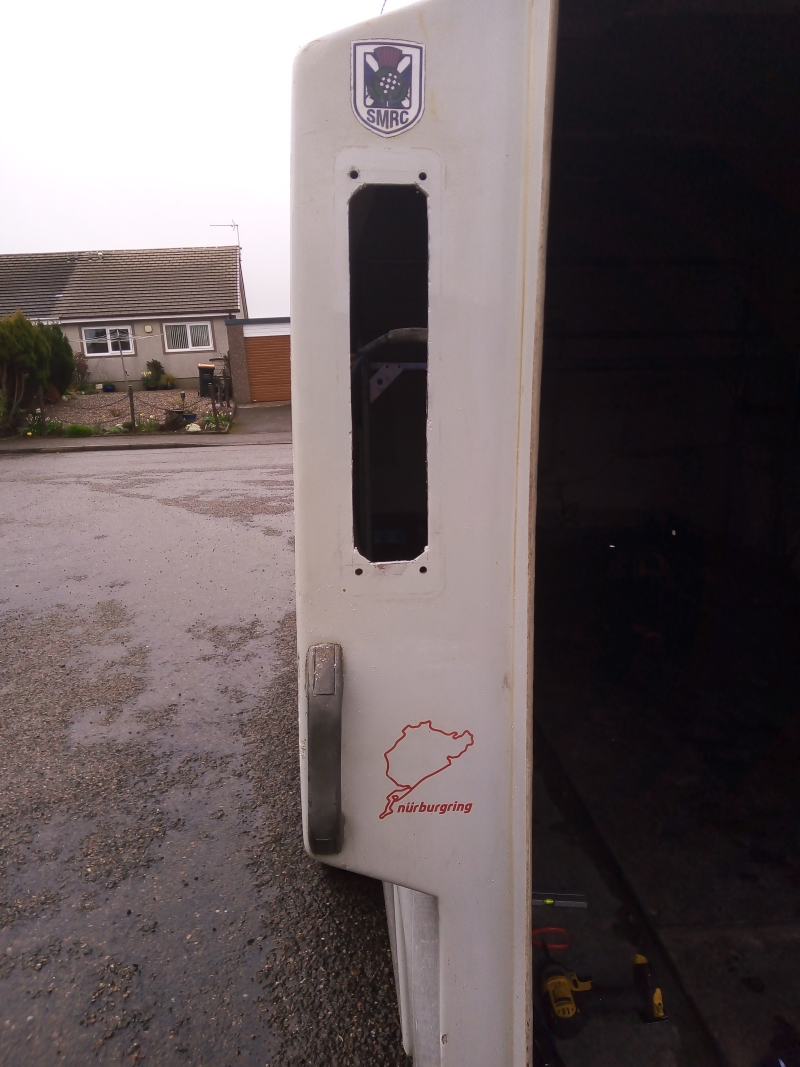 hole cut |
 LEDs fitted |
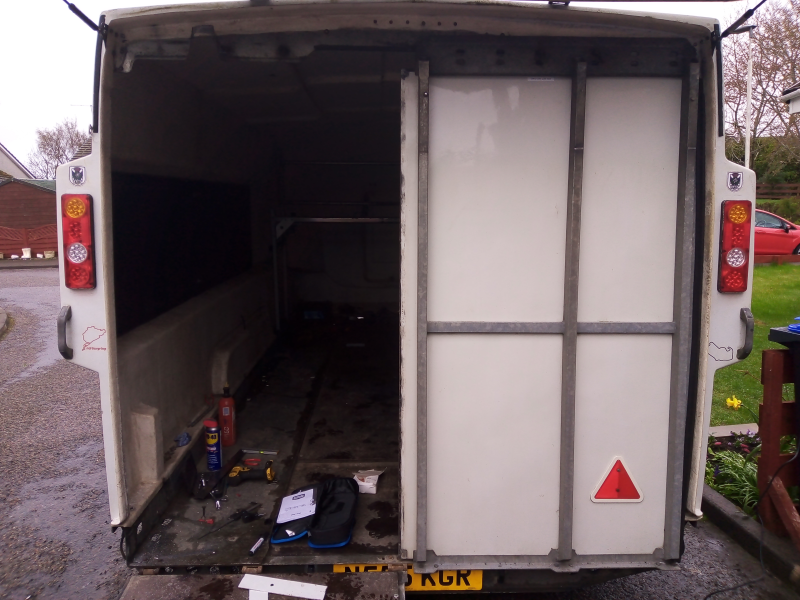
New lights also meant new wiring as the previous lights had no reverse connection. So a 13 pin trailer connection was fitted and the junction box at the rear of the trailer was rewired to allow a reverse connection.
While at the front of the trailer the strap winch was removed as it had be degraded by the UV in the sunlight. I then had space to fit a plywood & aluminium "step" at the front personnel door, this made getting in/out easier. I also fitted an Anderson connection and fed the wires back into the enclosure and onto a FIA cut-off switch. The switch allowed me to switch power for the electric winch I was planning to fit. It also disconnected the charge feed to the planned battery from the truck trailer wiring.
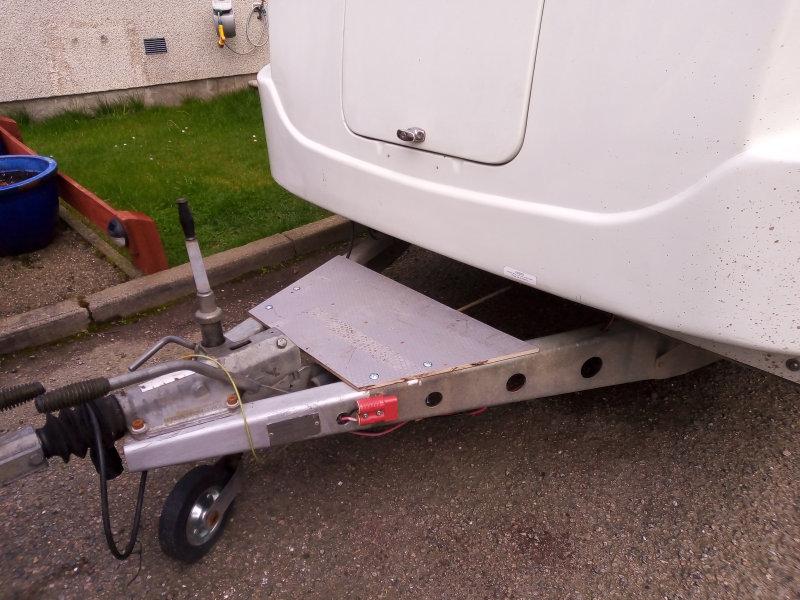 Access platform |
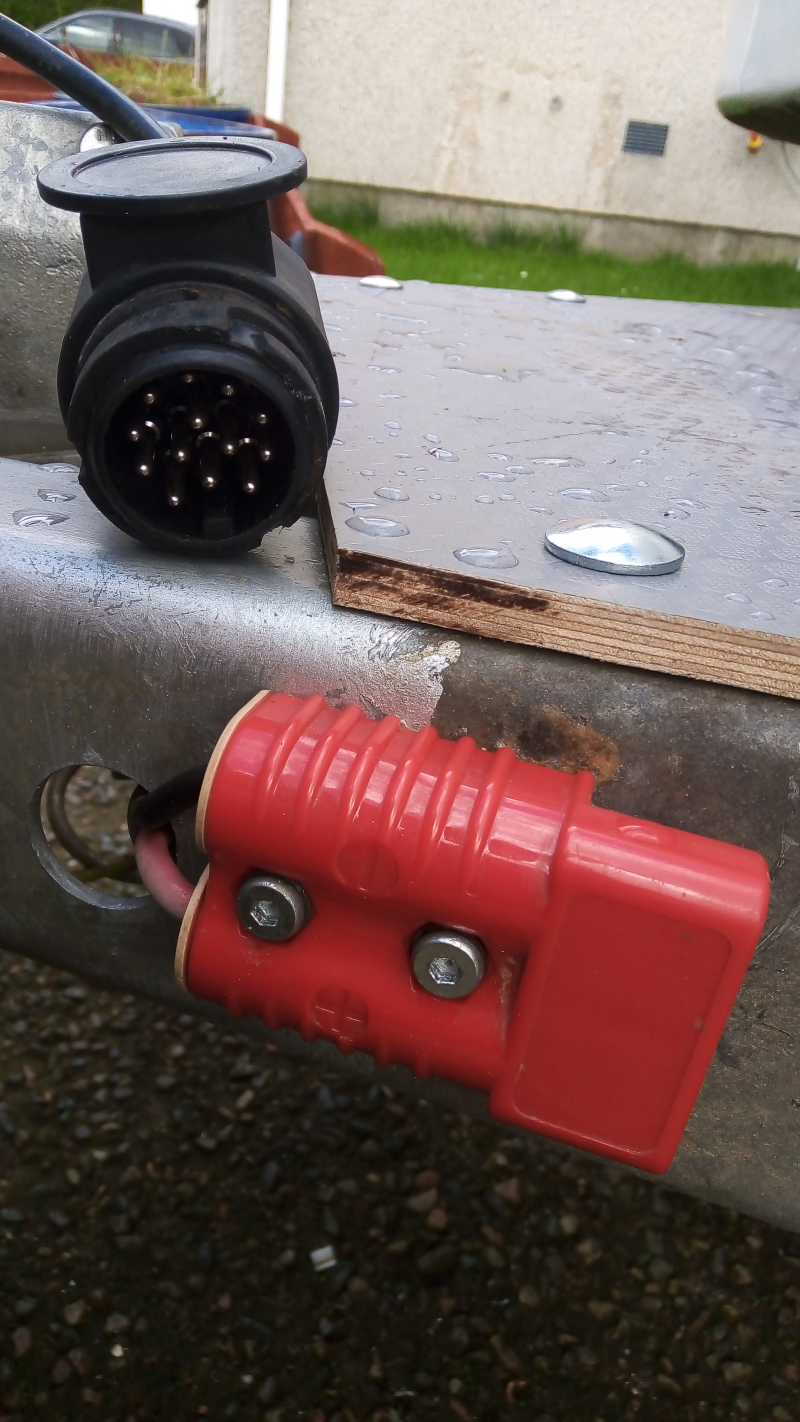 Anderson plug |
 13 pin trailer plug |
 FIA Cut off |
I then spent time cleaning the outside of the Racepod with some iron remover on the back, a good polish to remove some scuffs and the roof was cleaned of all the black spots and then treated with biocide.
I also fitted a Sharks Fin to the roof, just for looks which I felt it needed.
 Iron/Fallout remover |
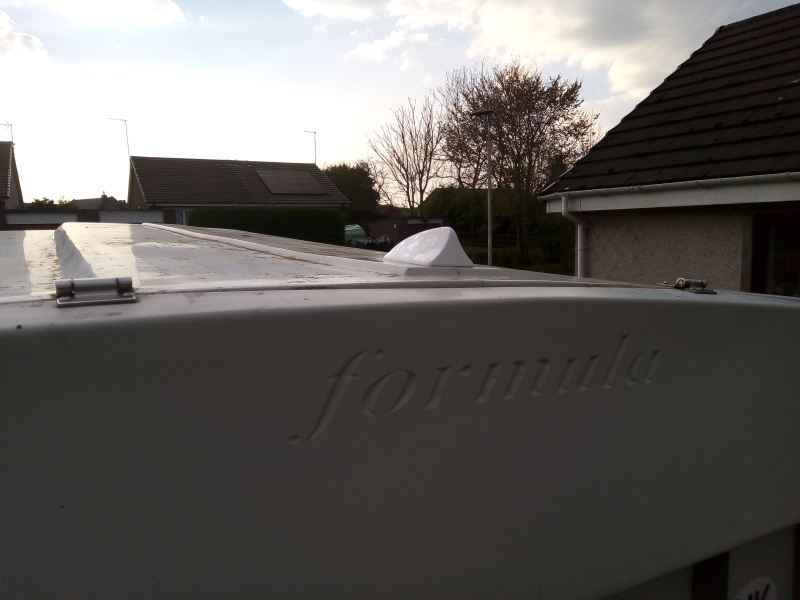 Sharks Fin |
With the outside work taken care of, I moved to the insides.
I gave the wall boards inside a couple coats of red enamel paint and fitted a fire extinguisher just in case. And then went about fitting the electric winch, winch relay and battery, all which I had removed from the open trailer.
I knew the Cub could be driven in, but the Coupe had to come in backwards and there would be no room to open the doors, so the winch would be needed.
The battery was connected up so it charged from the truck while it was running, the same as a caravan.
A couple of led "DRL" lights were wired above the front door to illuminate the Pod and a USB lighter socket to allow me to charge my phone.
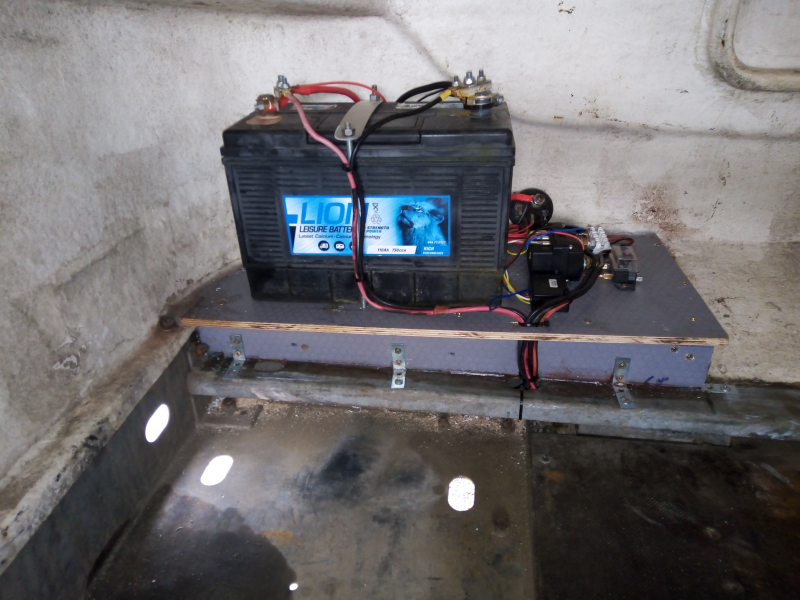 Battery |
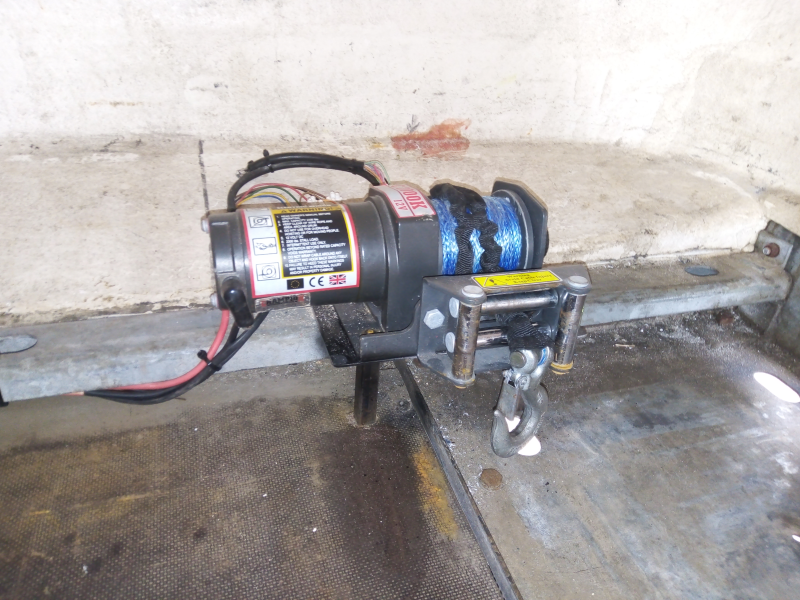 winch |
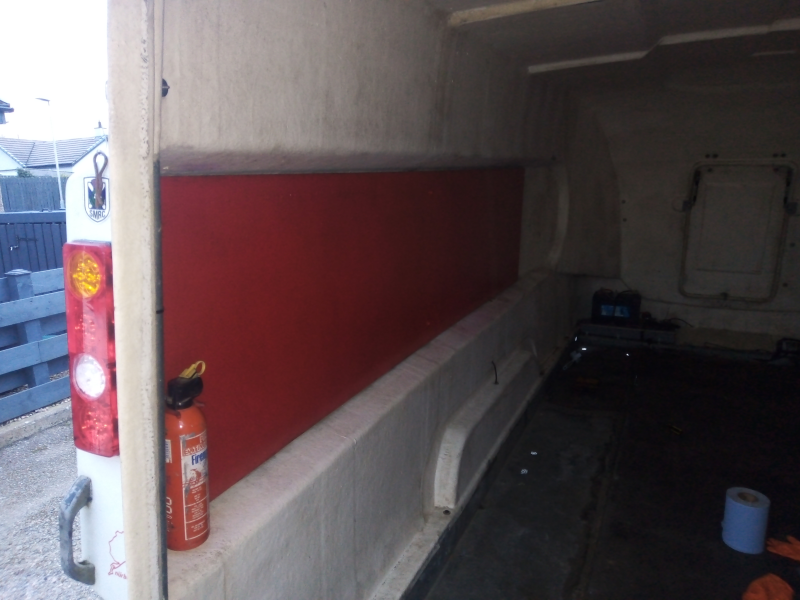 Painted red |
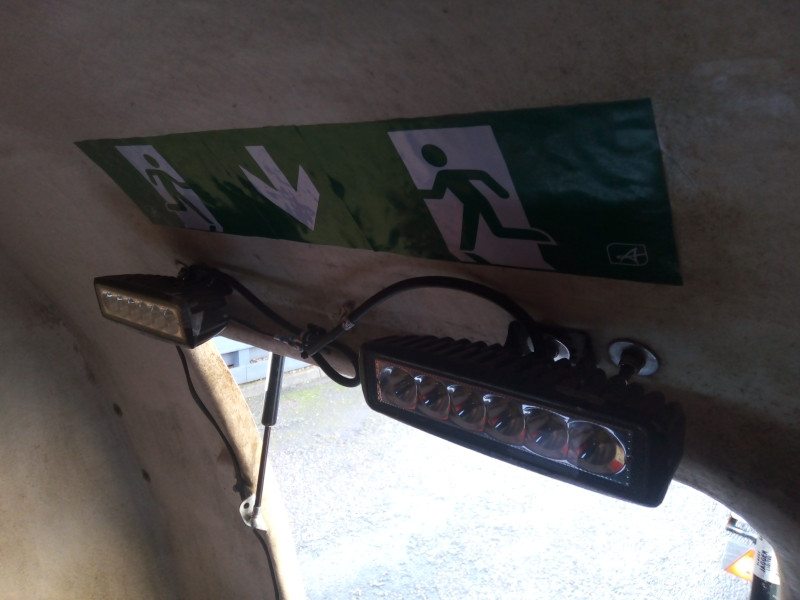 LED dlr |
It was now time for the trailers first outing, up to Alford. I could of driven the Cub there, but wanted to try the Racepod out within a reasonable distance of home.
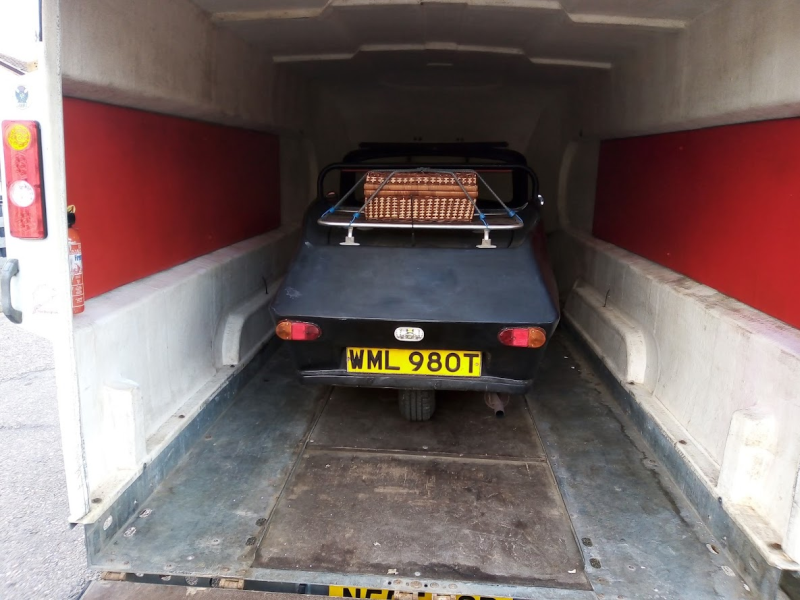 Ranger Cub aboard |
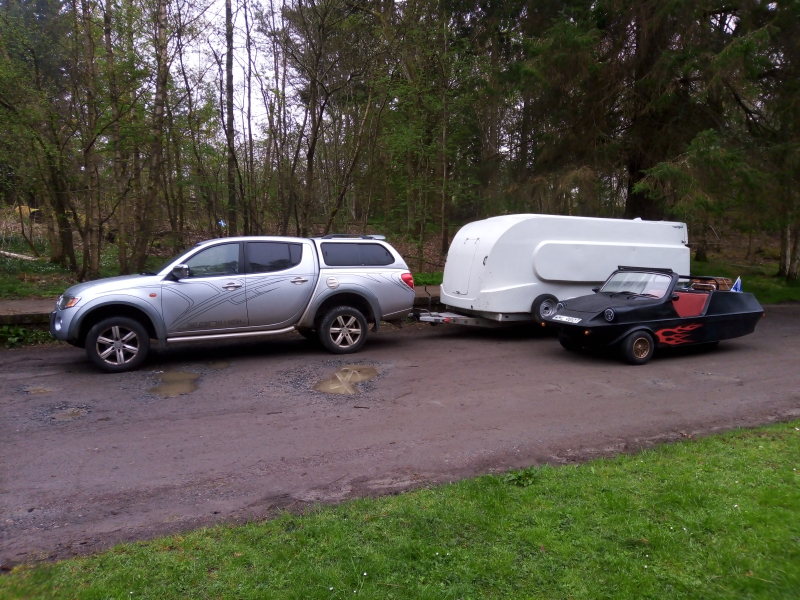 Haughton Park, Alford |
The first trip was uneventful, apart from finding that tying down the rear wheel was difficult. It needed two ratchet straps, but the exhaust tailpipe was in the way. I decided to make some sort of "holder" for it instead. My first try was to make what looked like a trucks 5th wheel. This worked to an extent, but I have since modified it to have higher sides.
I also added a padlock on the rear doors, and replaced the handle and lock on the front door. This was for security when I was away from the Racepod.
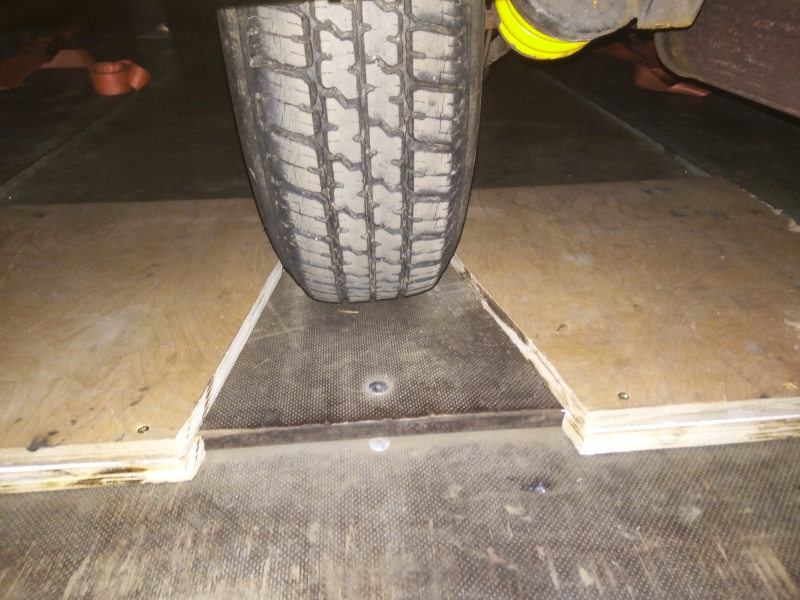 Rear wheel |
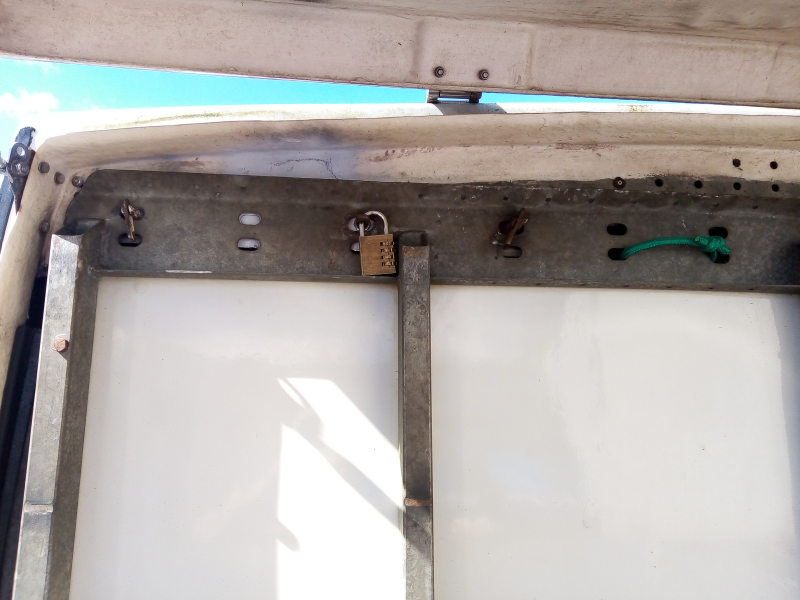 Security |
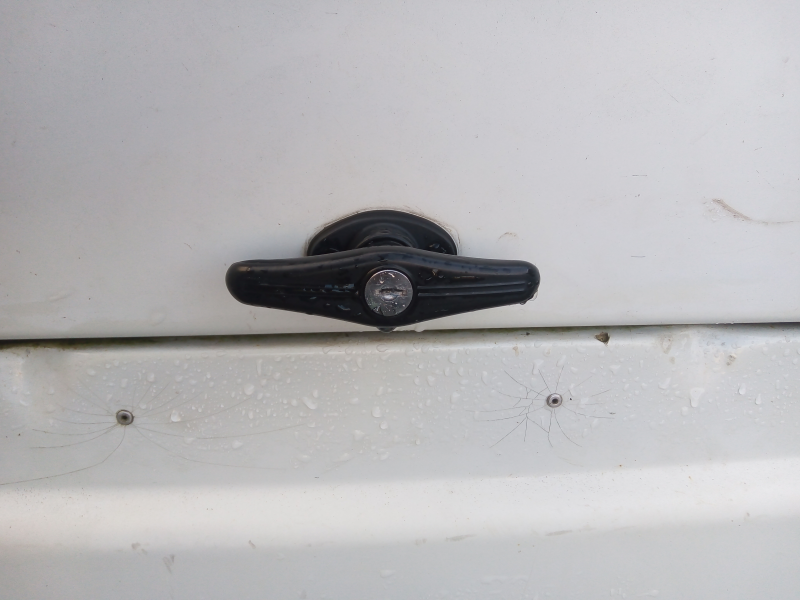 Access door handle |
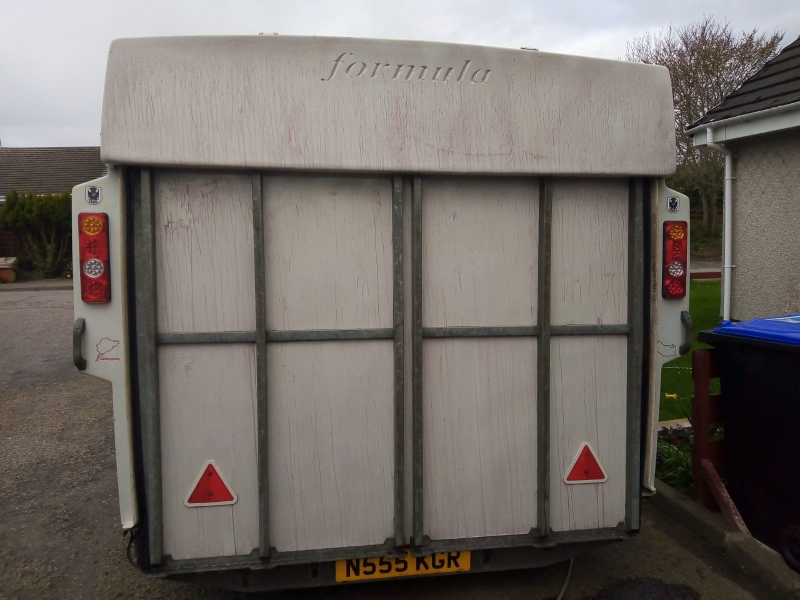
While driving around, I saw quite a few trucks/caravans had high mounted brake lights fitted. I decided that this was a good idea, and it also made the back of the trailer look a lot less like a slab of white. I settled on a pair of round LED tail and brake lights.
At the same time I fitted a reverse beeper to the rear right lights and a wireless reversing camera. This made reversing the Racepod a lot safer. I mounted a switch in the rear cab of the truck that allowed me to choose between the truck camera and the trailer camera.
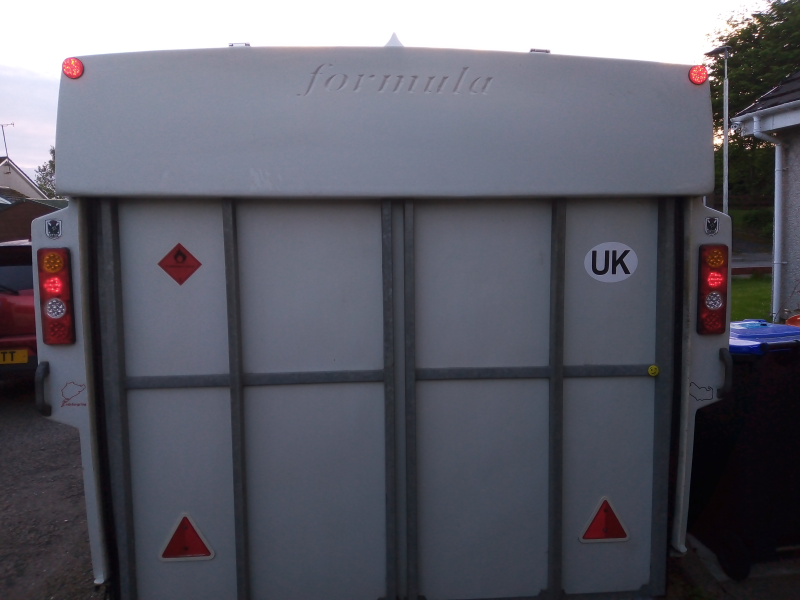 Rear lights |
 reverse camera |
I used the Racepod for a few local, one day shows. Again a couple I could have driven to, but I wanted to use the Racepod to make sure there were no issues with it. I found it towed very well, and the camera made reversing so easy.
However I knew that my first two night event was due soon. So I started to prepare for using the Racepod as somewhere to sleep.
I knew the basics I needed was a table to place a camping stove on, and somewhere to sleep on. Also as the weather wasn't looking too great, a source of heat could allow me to dry out clothing and keep the damp away.
I manage to pick a Parking/Night heater up off eBay. I went with this one rather than the others as it was separate components rather than an all in one. It came with the solid nylon fuel line, rather than the green soft type and the latest "6" blade LCD controller. Also included was everything I would need to fit and set it up. And all less than £35 !
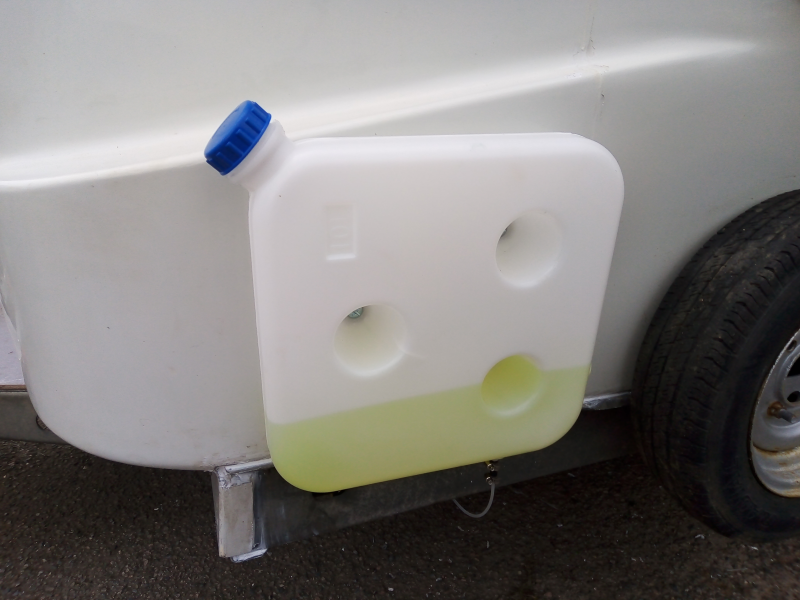
I positioned the diesel tank in front of the spare wheel on the left.
This was for a couple of reasons.
It was protected by the spare wheel.
It was on the same side and nearby the truck filler cap so both could be filled one after another.
Being outside meant no risk and fumes inside the Racepod.
The fuel line was ran under the floor, through the filter and pump and into the heater. The cold intake and exhaust were also under the floor. Meaning that, again, any fumes were kept outside.
For a table I picked up an old single bed headboard, fitted some strengthening strips underneath and hinged it to the right hand wall. A simple pair of ring eyes and a carabiner held it up and a strut underneath supported it when open. I later on had to modify this as I found the ring eyes broke. So now its held in place by a wooden turn buckle.
The bed was a simple plywood base, with a surround of wood. This worked well enough for the first weekend. I put some foam matting on it and my self inflating camping mattress on it. It slipped under the Cub for the journey there.
 Diesel tank |
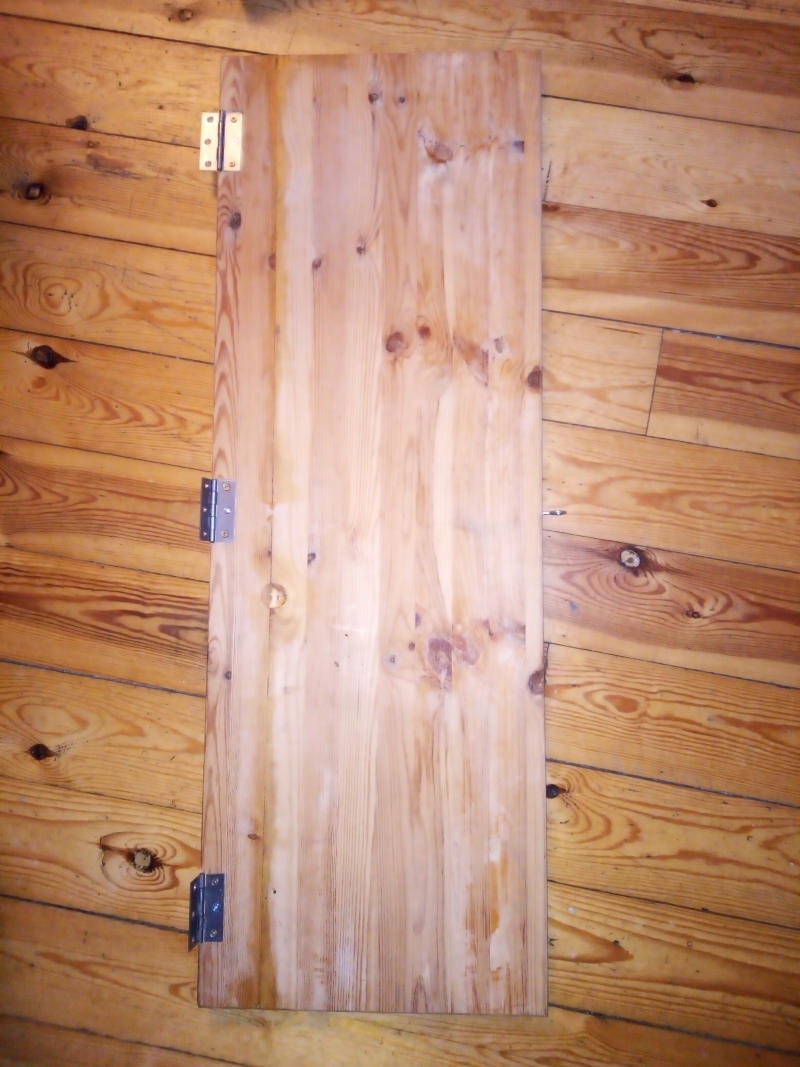 Headboard table |
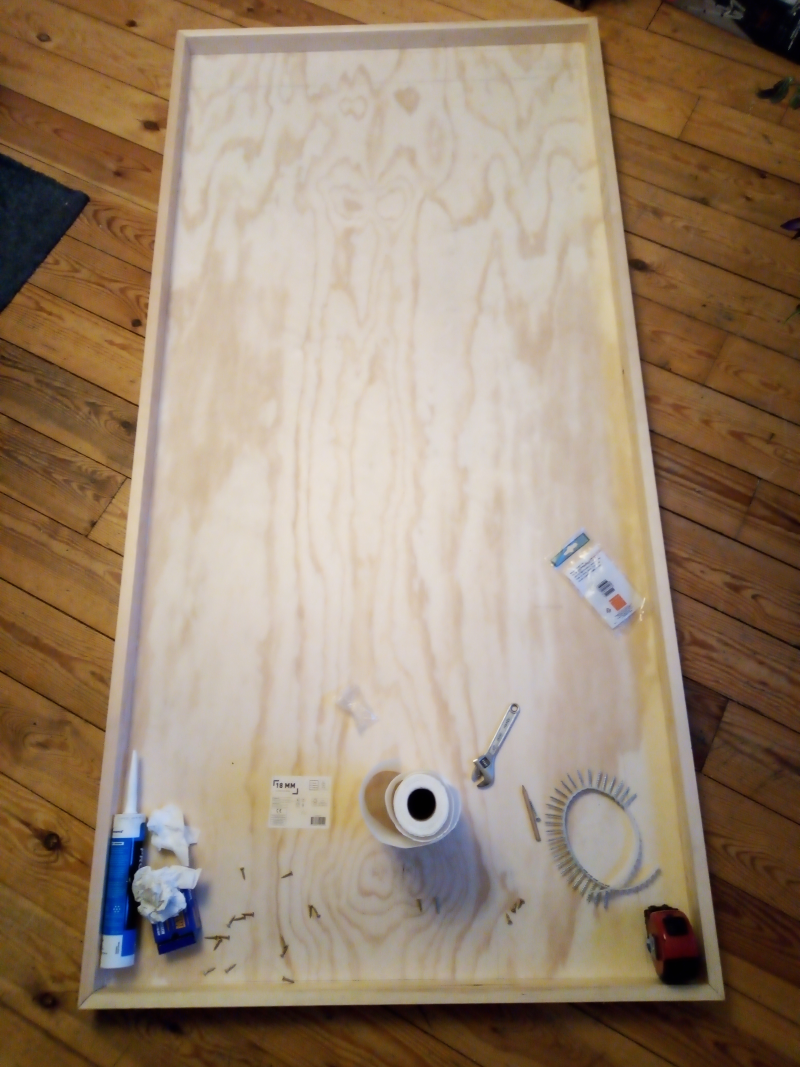 Bed frame |
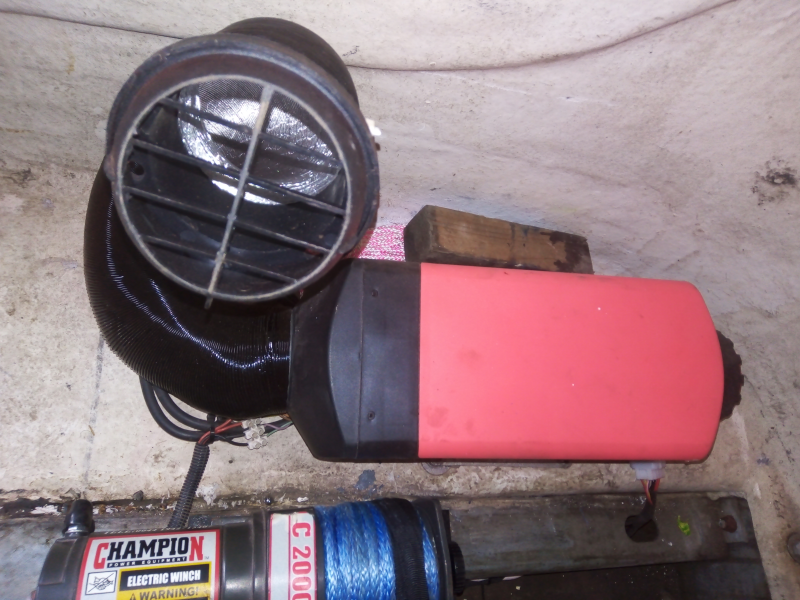 Night heater |
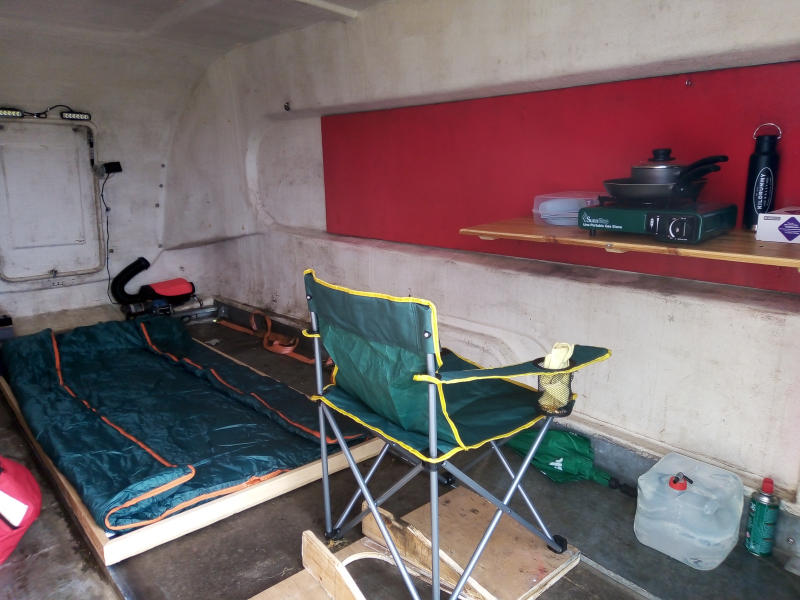 First night |
The first weekend was a success, despite the weather. The only issues I found was I had to run the truck on the Saturday for a time to charge the battery up as the heater used quite a bit of capacity. The large LED lights were too powerful. And sleeping on the floor was okay, but heat rises and it was colder than it needed to be as below the frame was the wooden uninsulated floor.
The first solution was to fit the bed to the wall, where it hinges down with a couple of support legs. The foam was removed and a proper foam mattress used instead.
To provide power I fitted a second battery and a 200W solar panel and MPPT controller. A second 100w panel has since been fitted, just as it was available at a reasonable price.
Both panels produce a similar Vmp (18.24v & 18.15v) and Imp of 10.97A & 5.9A respectably. This gives a total current of 16.87A as its wired in parallel, with the voltage sitting at the lowest figure of 18.15V.
The charge controller maxes out, current wise, at 15A so I get 15A x 18.15v = 272.25Watts total power available. This is loads more than is needed but the weather here can be variable, so more solar is better. This has increased the trailer height by 60mm/2.3" to 2310mm/7' 7.3".
I also noticed that the diesel was turning a funny colour. On researching this I found that it also can be affected by UV sunlight, so the tank was painted leaving a small strip to check fill levels.
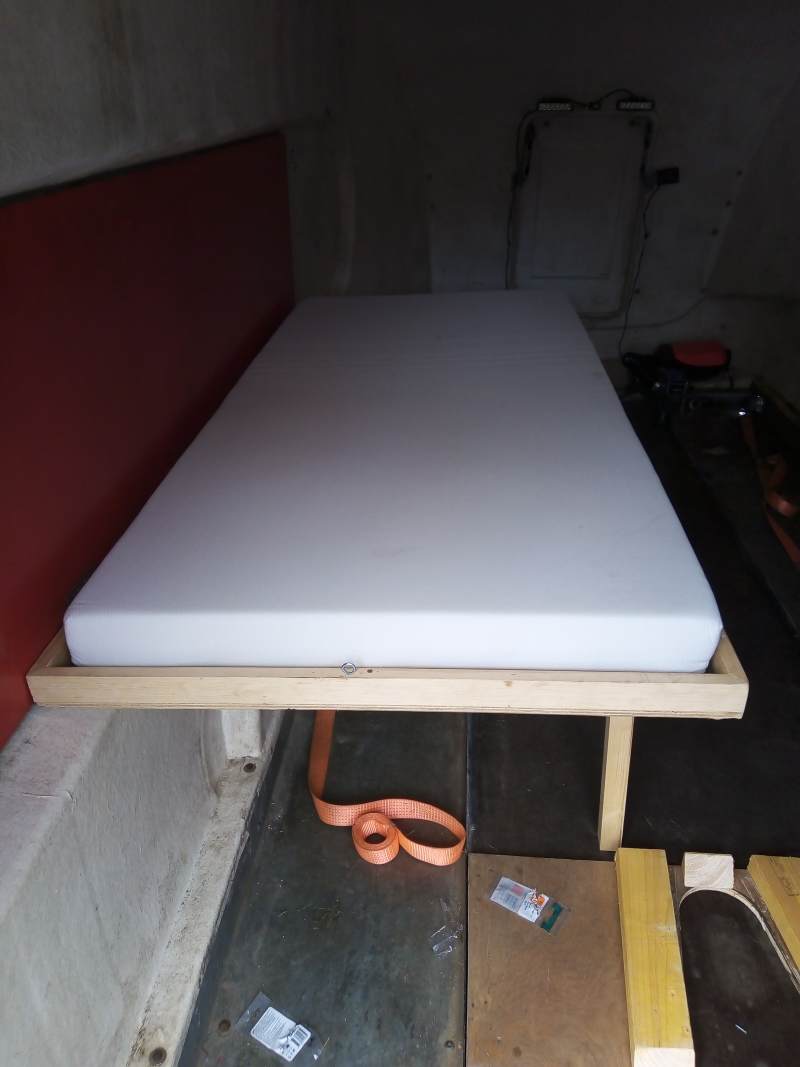 Walled mounted and mattress |
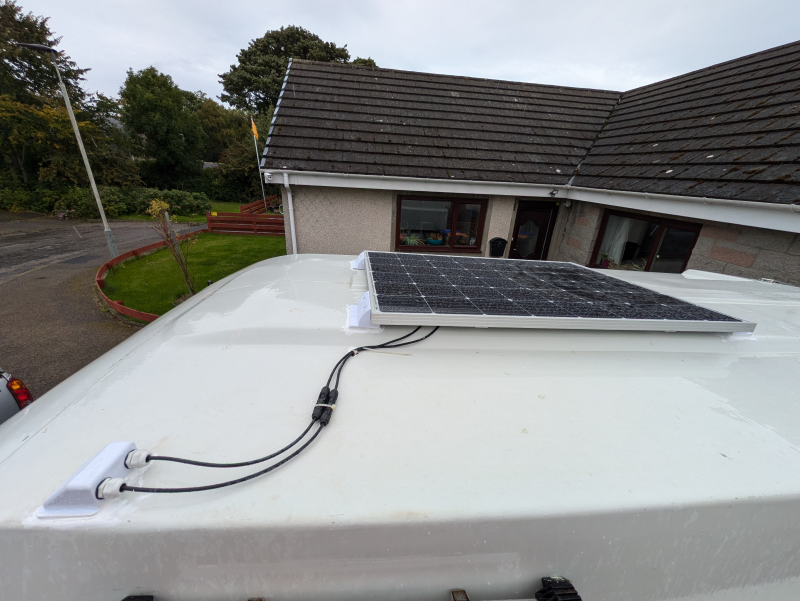 Solar |
 Solar |
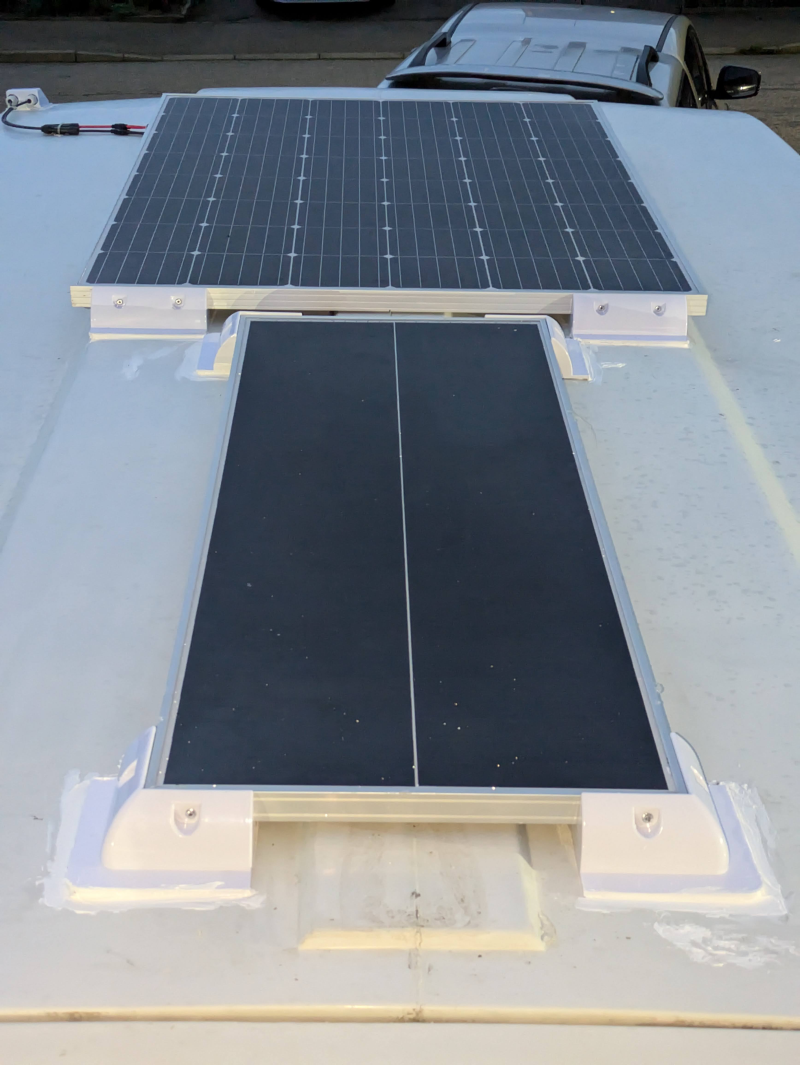 Additional panel |
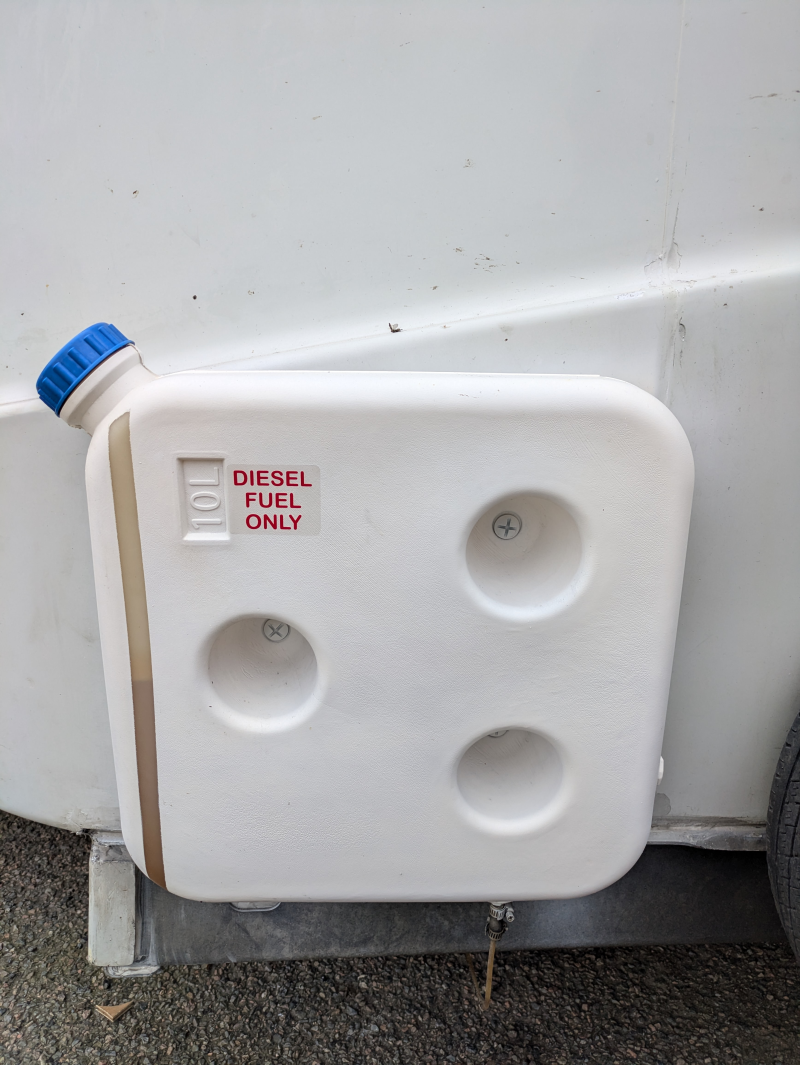 Tank painted |
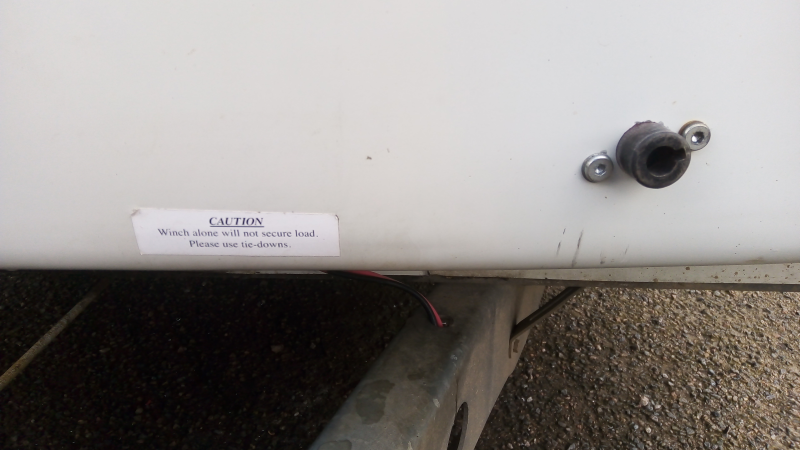
While at a local autojumble, I managed to pick up an external mounted 16A commando socket. I have mounted this on the right hand side of the Pod, as this is the side next to the external 13A sockets of the house. This is ran to a RCD metal clad double socket inside the Pod. It just there if I find I need to charge the car battery (this might be possible off the leisure batteries, need to research this) or the leisure batteries themselves over the winter, if the solar doesn't provide enough. However I don't expect to use much power, apart from running the heater every now and then to keep it working.
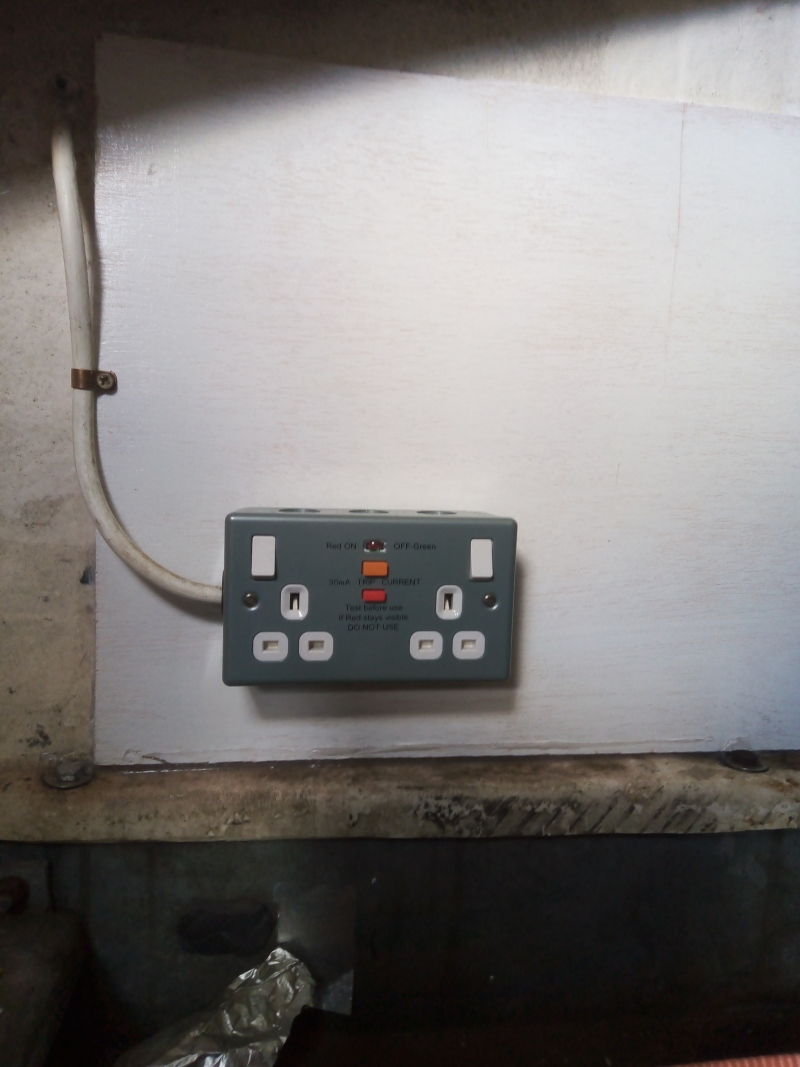 Double socket |
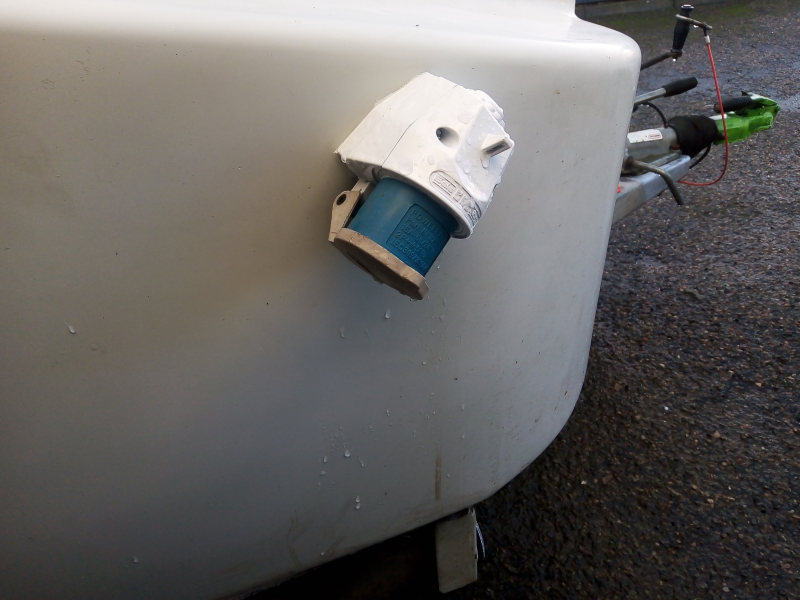 Commando plug |
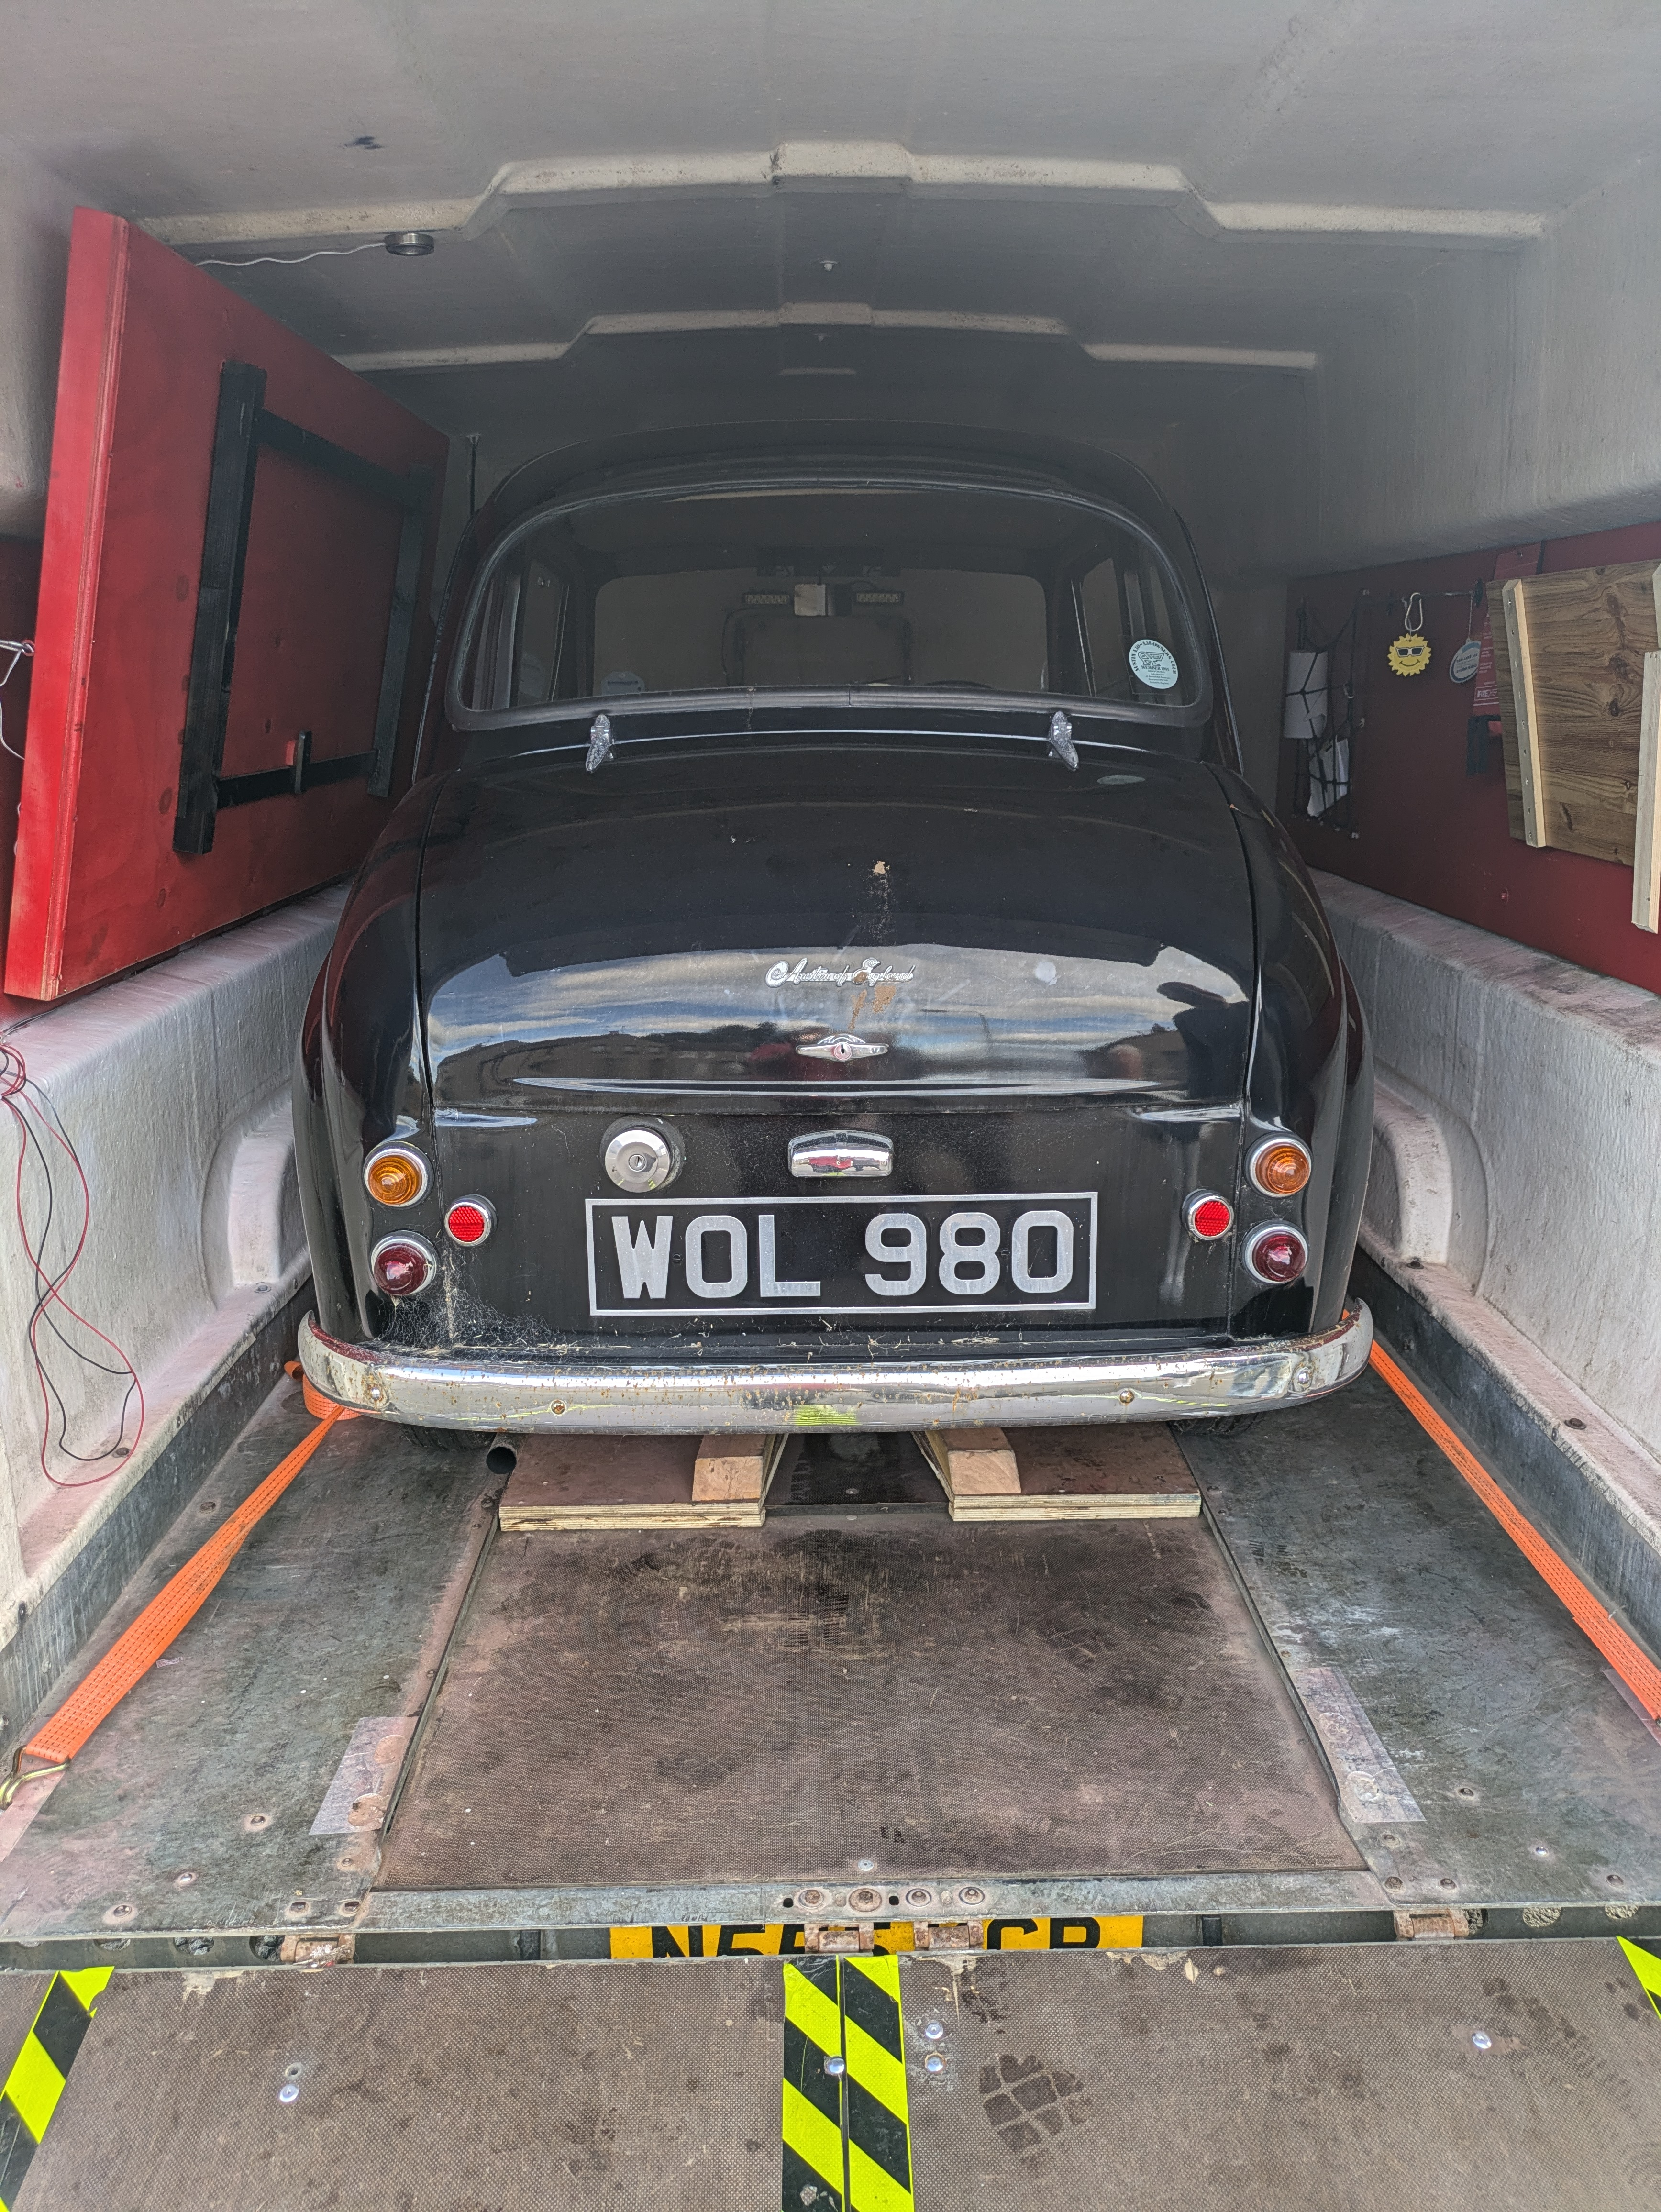
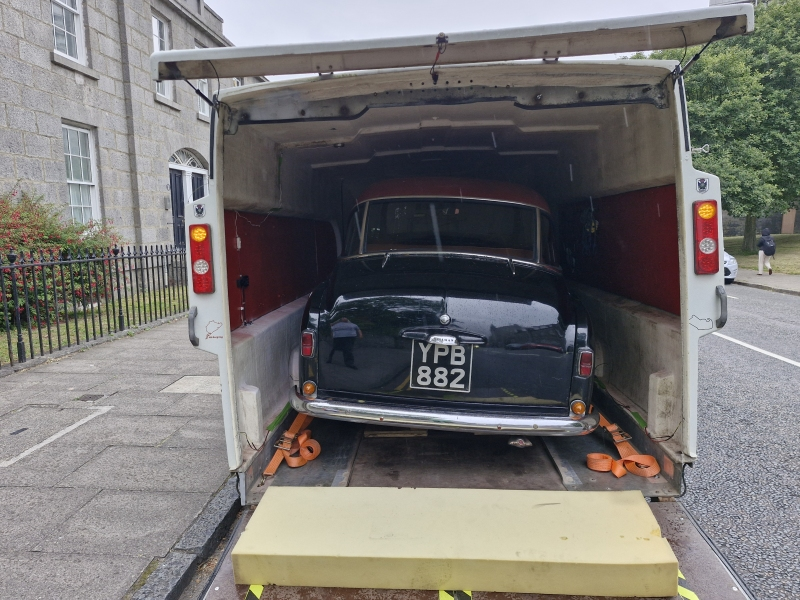
As for loads in the trailer, I've used it to, so far, transport plywood sheets, plasterboard sheets, a couple of GTM Coupes, 1958 Austin A35 and a 1955 Hillman (Minx) Californian .
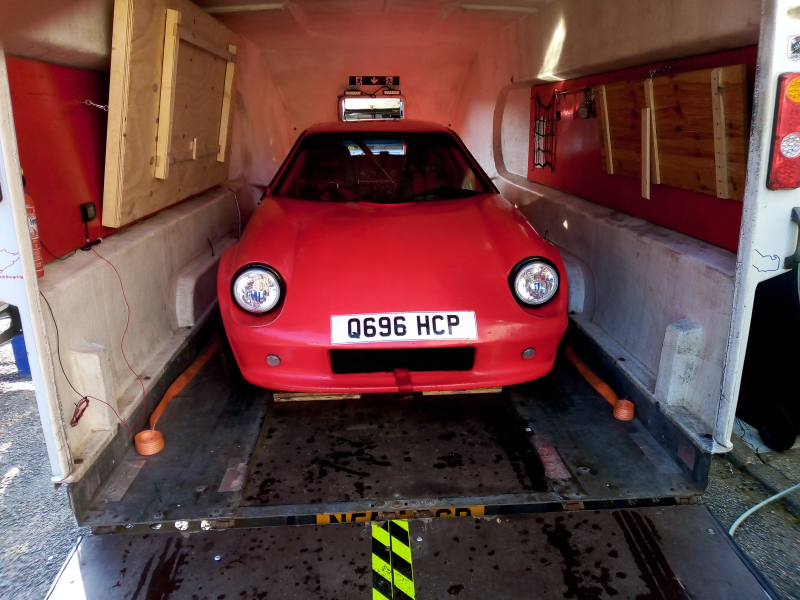 GTM Coupe onboard |
 1958 Austin A35 loaded |
 1955 Hillman |
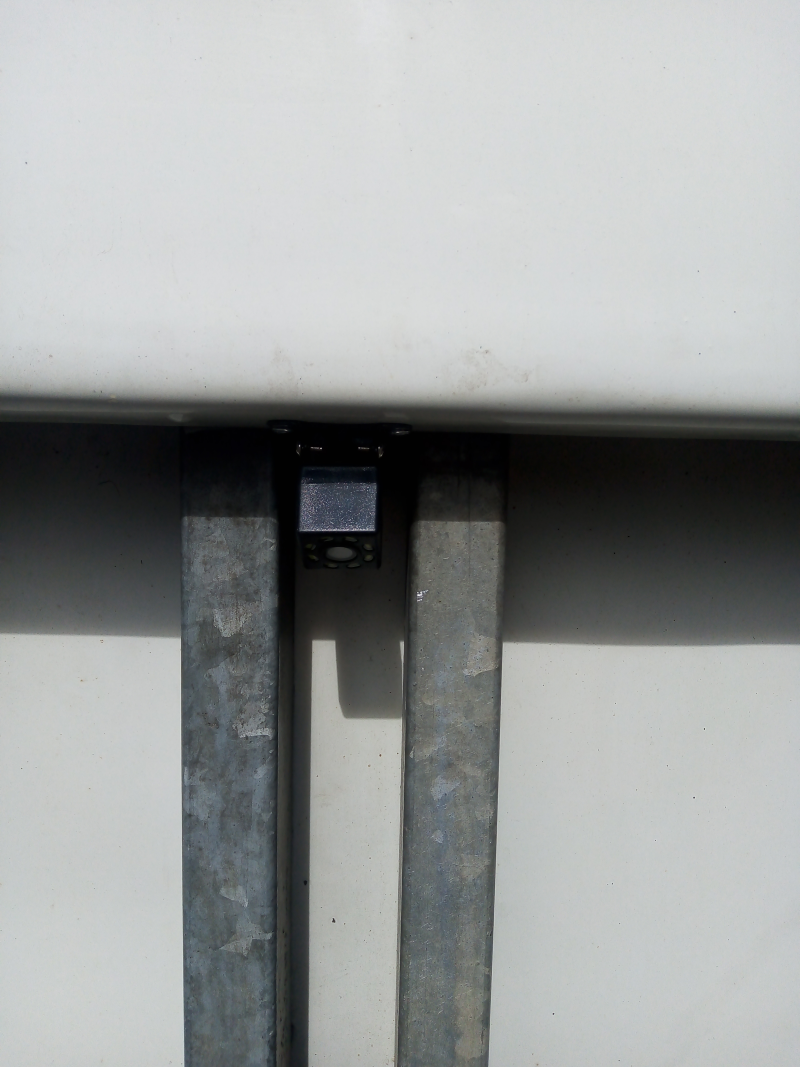
During 2025 some changes were made to the trailer, the fold down bed was removed and the night heater was transferred to another vehicle. Externally the diesel tank was removed and a set of side marker lights fitted to match the new tow vehicle.
 Side marker lights |
